When you have to switch from your favorite Eclipse IDE to IntelliJ, then it might be hard for you to get comfortable with IntelliJ IDEA initially, especially if you’ve been using Eclipse for a long time.
It requires understanding of some fundamental differences between the two IDEs. But, once you get used to IntelliJ, then you will like it more than Eclipse.
In this article, we are gonnna see some key things that might help you to get familiar with IntelliJ and improve your productivity.
Workspace
The first thing you’ll notice when launching IntelliJ IDEA is that it has no workspace concept. This means that you can work with only one project at a time. While in Eclipse you normally have a set of projects that may depend on each other, in IntelliJ IDEA you have a single project that consists of a set of modules.
If you have several unrelated projects, you can open them in separate windows.
If you still want to have several unrelated projects opened in one window, as a workaround you can configure them all as modules in IntelliJ IDEA.
Working with Multiple Projects
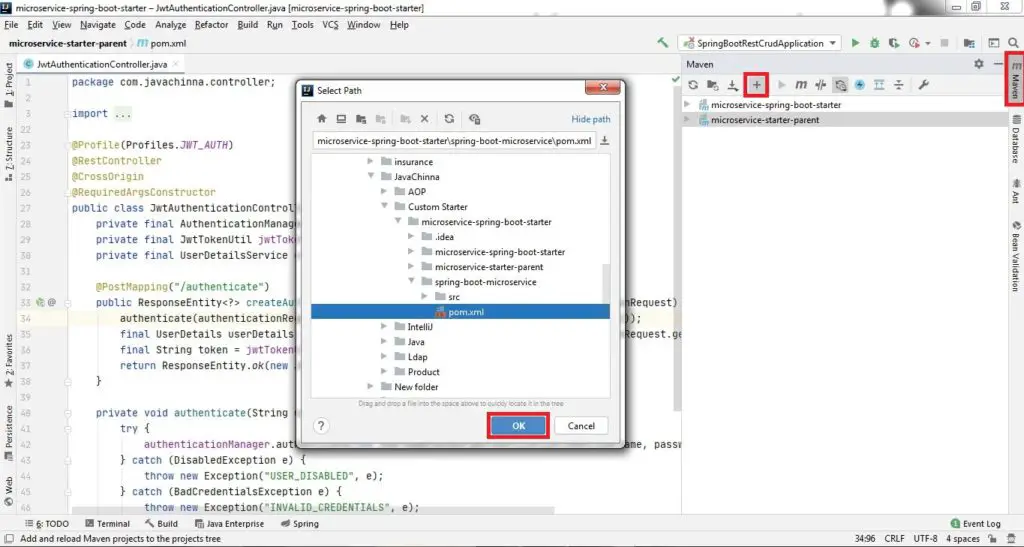
If you have multiple maven projects and you want those projects opened in one window, then you can open one project by selecting the pom.xml file.
Once the project is opened, click on the + icon in the “Maven” window on the right (View > Tool Windows > maven) and then select the additional pom file you want to import:
Shortcuts
IntelliJ IDEA shortcuts are completely different from those in Eclipse. For Eclipse users who prefer not to learn new shortcuts, IntelliJ IDEA provides the Eclipse keymap which closely mimics its shortcuts.
To use the Eclipse keymap, Go to File > Settings or Press Ctrl+Alt+S to open the Settings Window and Click on the Keymap tab on the left and select the Eclipse keymap from the dropdown as shown in the screenshot below
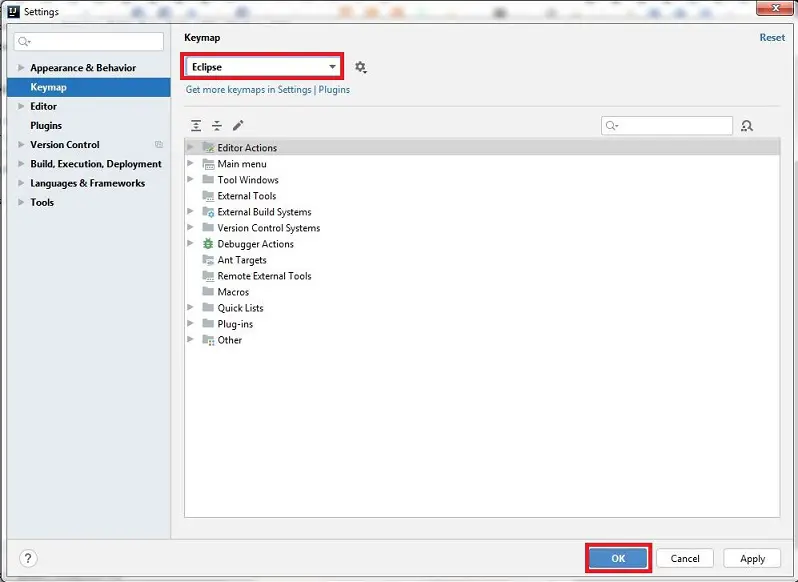
Now, you will be able to use most of the Eclipse keyboard shortcuts in Intellij.
Locating Files on Project / System Explorer
In Eclipse, you might have used shortcuts to select the opened file in Project Explorer. But IntelliJ has different shortcuts to perform the same
| Eclipse | IntelliJ | |
| Project Explorer | Alt+Shift+W, P | Alt+F1, 1 |
| System Explorer | Alt+Shift+W, X | Alt+F1, B |
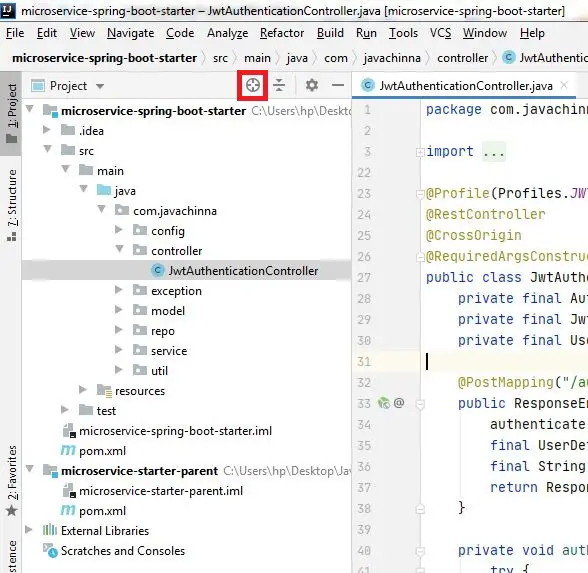
You can also select the file using the select button in the Project View
‘Save’ button and Save Actions
IntelliJ IDEA has no Save button. So, you don’t need to keep on pressing the Ctrl + S like you do in eclipse whenever you do a change.
Physical saving to disk is triggered by certain events, including compilation, closing a file, switching focus out of the IDE, etc. You can change this behavior via Settings/Preferences > Appearance & Behavior > System Settings:
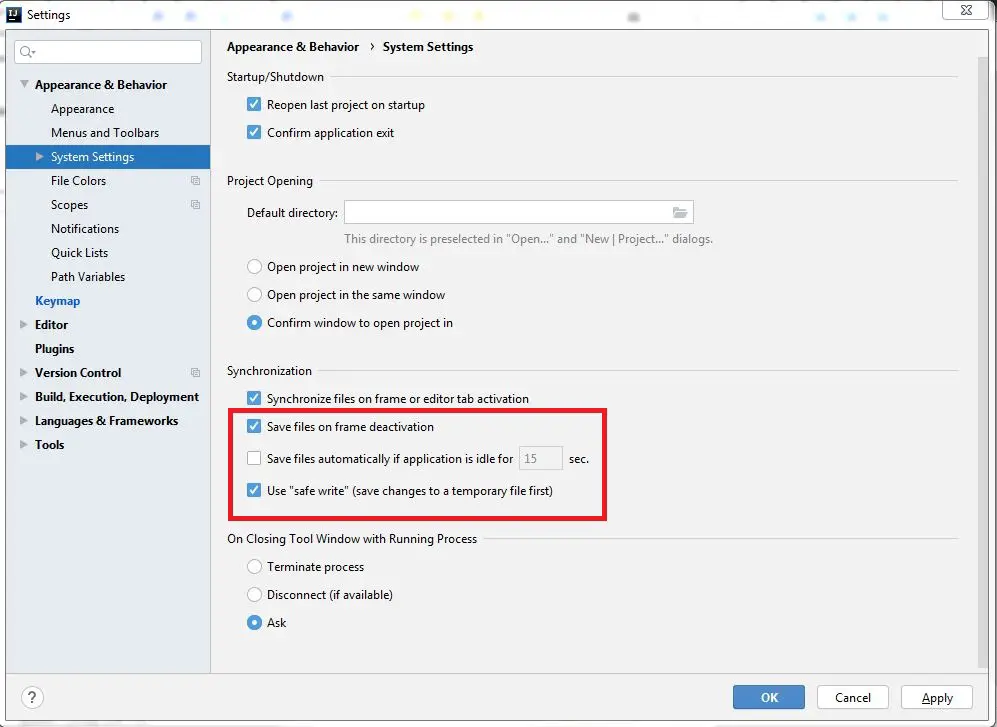
It is also worth noting that there is no save actions, i.e. the actions triggered automatically on save, such as reformatting code, organizing imports, adding missing annotations and the final modifier, etc. Instead, IntelliJ IDEA offers you to run the corresponding actions automatically on commit.
Camel Case Navigation
You can navigate to a file using Camel Case
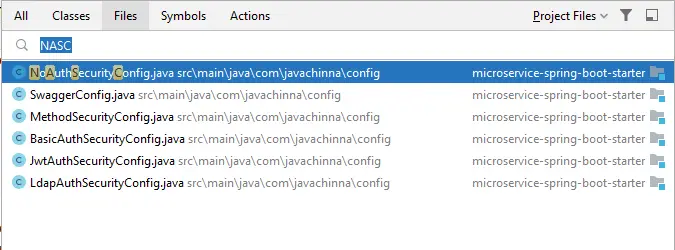
You can refer this article to learn more about Camel Case usages in IntelliJ.
Lombok Plugin
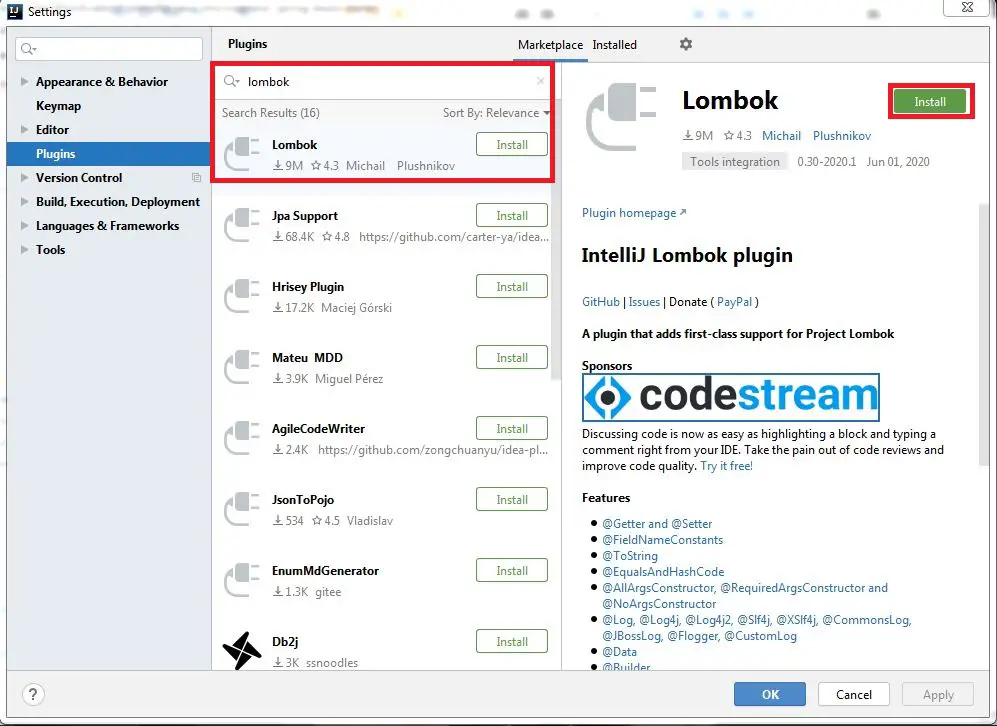
If you are using Lombok in your project, then you need to install the Lombok plugin
Installation
Got to Settings > Plugins and type lombok in the search box and install
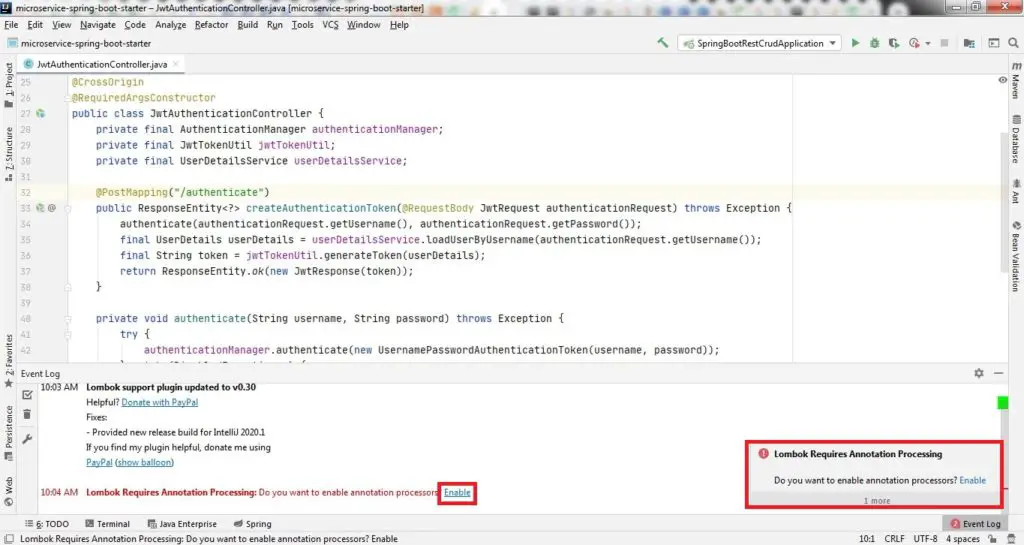
Enable Annotation Processing
Generate Sequence Diagrams
You can download the open source SequenceDiagram plugin from here and install it
Go to Settings > Plugins window
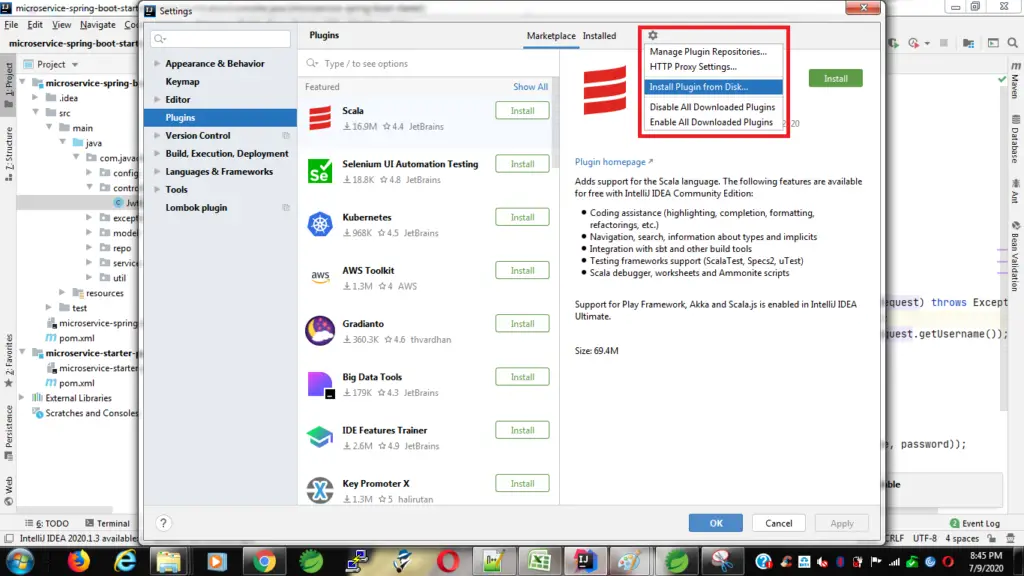
Select the downloaded archive file and click ok
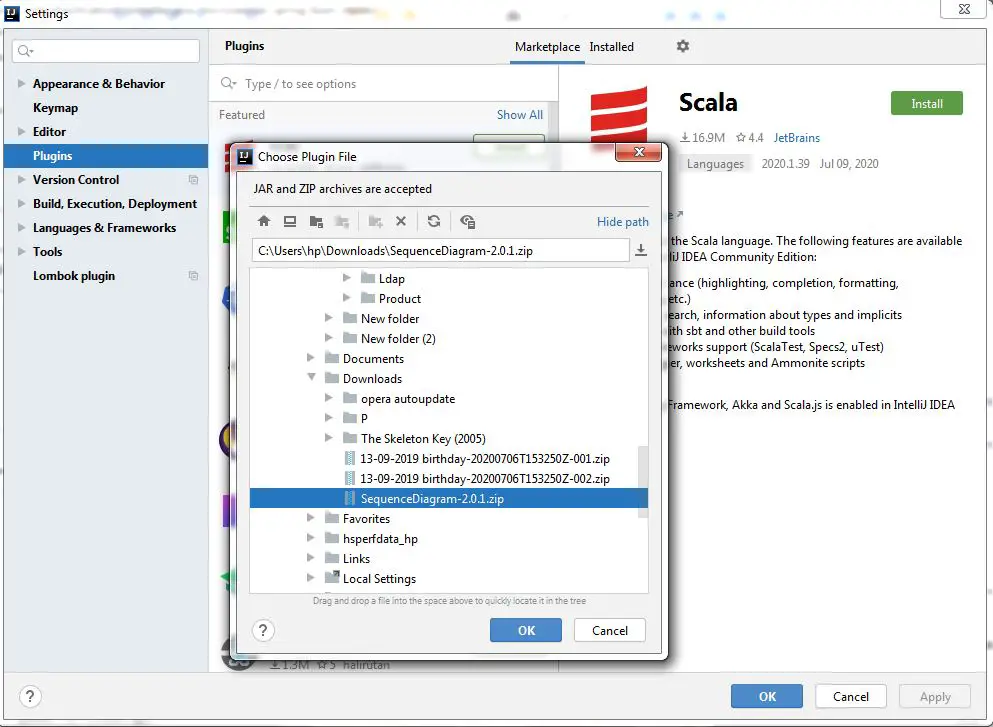
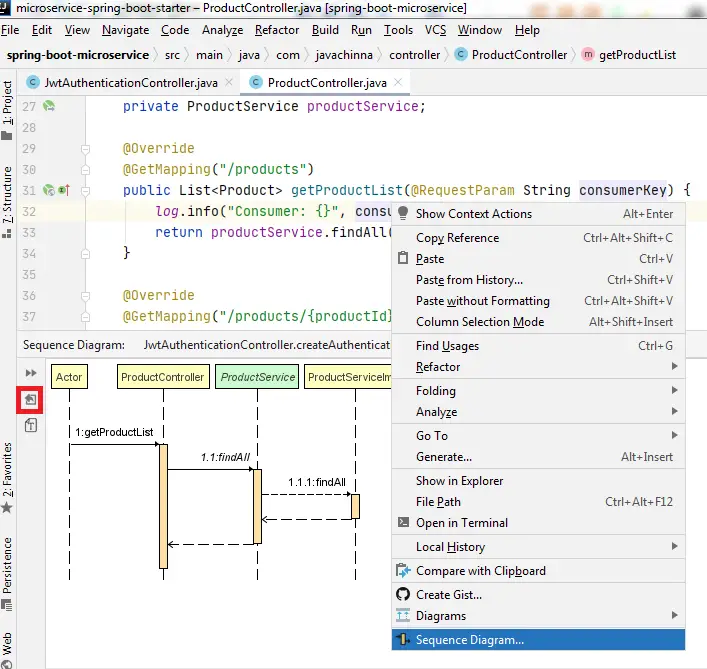
Once installed, you can generate Sequence Diagram with just few clicks and you can even export it as image
Just right click on a method for which you wanna generate sequence diagram and click on the Sequence Diagram context menu:
References
https://www.jetbrains.com/help/idea/migrating-from-eclipse-to-intellij-idea.html
Conclusion
That’s all folks! In this article, we’ve covered some important things for switching from Eclipse to IntelliJ IDEA.
